


It's been a long time coming, but I finally came around to set up MongoDB with replicas for local development.
TLDR; clone the repository, run docker compose up -d, and you are good to go!
If you want to know more, continue to read below.
Context
Running MongoDB with replicas locally is useful for a number of reason, but for me, I need it to run Debezium for Change-Data-Capture use case which requires it.
I have tried a number of solutions online, and was never able to succeed for some reason, although I did come close to it a couple of times. In any case, I would like to jot down some notes for the future me.
Configuration
Keyfile
A keyfile contains a shared password used as challenge and response for internal authentication.
To generate it, run
openssl rand -base64 756 > mongo-replica.key
Startup
To run it
docker compose up -d
This will start up 4 containers;
mongo-1: PRIMARY
mongo-2: SECONDARY
mongo-3: ARBITER
mongo-setup: SETUP replicas via
setup.sh
The default username is admin and password is password as defined under MONGO_INITDB_ROOT_USERNAME and MONGO_INITDB_ROOT_PASSWORD environment variable respectively. And using mgrs as the replicaset name.
However, do ensure that you do not have another running instance of MongoDB (at least not on 27017 port). Personally, I have issue connecting to replicas when another instance is running. (I haven't dived deep into why yet)
Please wait until mongo-setup container is shut down before connecting to the MongoDB instance.
Verify
Once the setup is done, we could verify to see if everything is set up as we wanted (i.e. replicas).
# exec into the container and running bash
docker exec -it mongo-1 bash
# connect to mongodb
mongosh --host mongo-1:27017 --username admin --password password
# checking the replica set status
rs.status()
The output will look something along the following
{
  set: 'mgrs',
  date: ISODate('2024-01-13T08:57:45.161Z'),
  // omitted
  members: [
    {
      _id: 1,
      name: 'mongo-1:27017',
      health: 1,
      state: 1,
      stateStr: 'PRIMARY',
      // omitted
    },
    {
      _id: 2,
      name: 'mongo-2:27017',
      health: 1,
      state: 2,
      stateStr: 'SECONDARY',
      // omitted
    },
    {
      _id: 3,
      name: 'mongo-3:27017',
      health: 1,
      state: 7,
      stateStr: 'ARBITER',
      // omitted
    }
  ],
  ok: 1,
  '$clusterTime': {
    clusterTime: Timestamp({ t: 1705136259, i: 1 }),
    signature: {
      hash: Binary.createFromBase64('62HGgCSWnDEzK2Ke+7HOtI8gz00=', 0),
      keyId: Long('7323504381729439750')
    }
  },
  operationTime: Timestamp({ t: 1705136259, i: 1 })
}
Connect
Mongo Compass (w/o replicas)
The following URI would work
mongodb://admin:password@localhost:27017/?authMechanism=DEFAULT&authSource=admin&directConnection=true
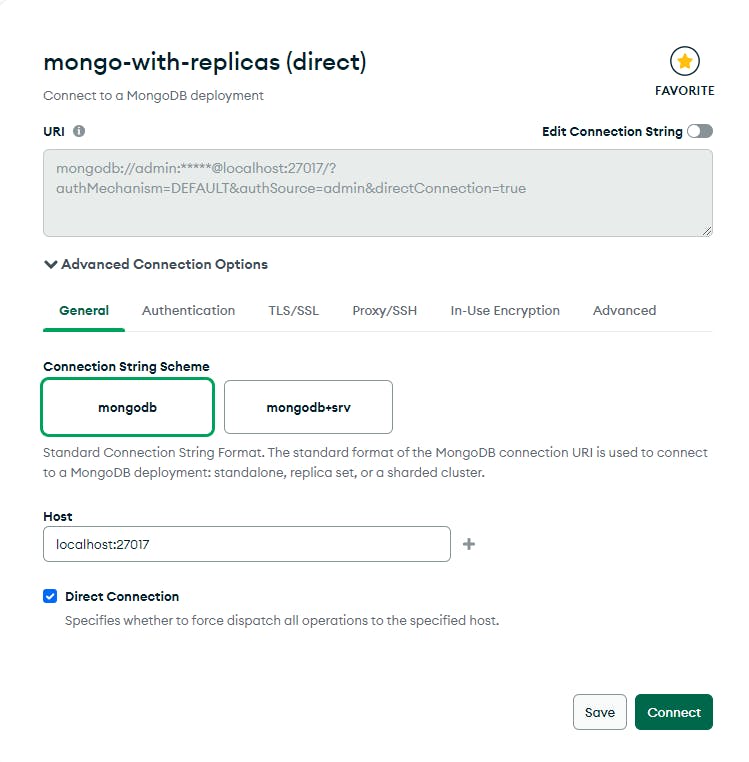
Direct Connection option is selected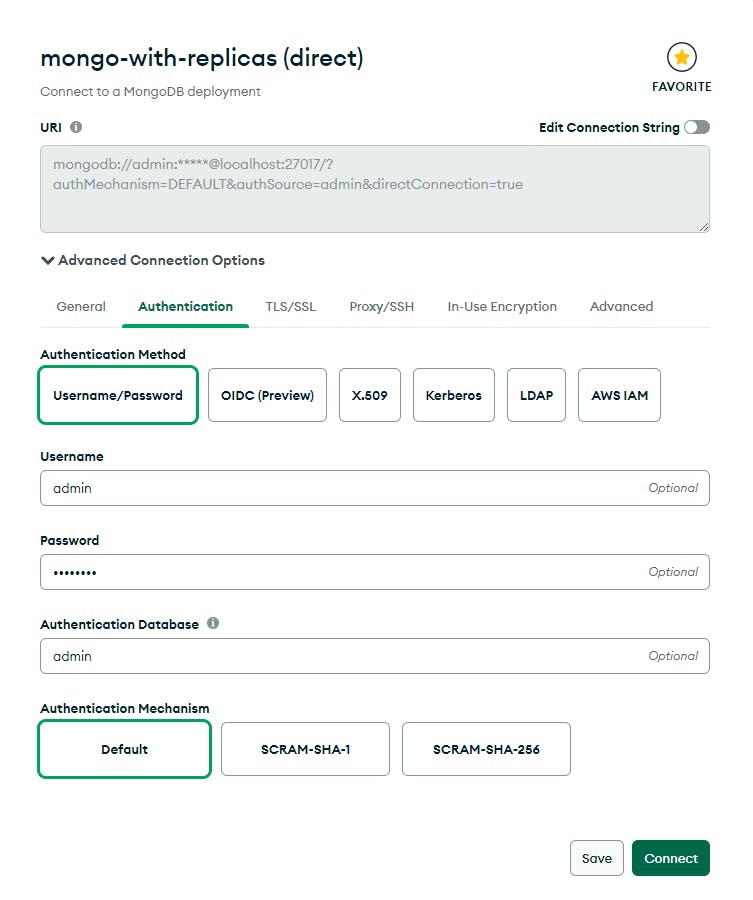
Mongo Compass (w/ replicas)
This is a little bit more tricky. You will need to add the following to your hosts file located in C:\Windows\System32\drivers\etc directory.
127.0.0.1 mongo-1 mongo-2 mongo-3
Make sure you have administrator rights to do so. Once done, the following URI would work.
mongodb://admin:password@mongo-1:27017,mongo-2:27017,mongo-3:27017/?authMechanism=DEFAULT&authSource=admin

Spring Boot
If you are using Spring Boot, you can use the following URI to connect as well
spring:
  data:
    mongodb:
      # either one would work
      # without replica
      uri: mongodb://admin:password@localhost:27017/bwgjoseph?authSource=admin
      # with replica
      uri: mongodb://admin:password@mongo-1:27017,mongo-2:27017,mongo-3:27017/bwgjoseph?authSource=admin&replicaSet=mgrs
Conclusion
In this article, I have talked about some of the things to note, such as the keyfile and how to connect to the replica set via Mongo Compass or in your Spring Boot application.
I hope this is useful and providing some context on why certain setup/configuration is required rather than just copying the scripts and hoping it will work for you.
Source Code
As usual, the full source code is available on GitHub